
Apple tools
Apple has several different encryption tools such as FileVault built into macOS, allowing you to encrypt your entire Mac or individual files or folders, and in this guide we'll show you how to do it.
With encryption, your data is encoded and there is no way to read it without access to a secret key, password, or portable RFID chip.
Encrypt folders
If encrypting your entire computer seems unnecessary for your situation, can encrypt individual folders on your computer. This provides a great solution when sharing folders. Before you begin, be sure to add all relevant files in the folder you want to encrypt.
To encrypt the data, go to the Finder folder > Applications > Utilities. Choose ‘Disk Utility‘. At the top of the menu, select File > New Image > Folder Image. Choose the folder to which you want to add a password, then click on ‘Choose’.
On the next screen, choose your encryption level (128-bit or 256-bit AES encryption) and your password. Click on ‘Choose’. Next, next to ‘Image Format’, select ‘Read/Write’. Select ‘Save’ to exit the window, once the system finishes encrypting the folder, click ‘Done’. Exit ‘Disk Utility’.
Your newly created .dmg file is safe. You can share the .dmg file as you would any other file.. Double-click at any time to open it; you will need to enter the password to complete the process.
Encrypt files
You can also encrypt individual files through macOS. This is only possible through certain native Apple applications., such as ‘Notes’, ‘Keynote’ and ‘Numbers’.
To lock a ‘Notes’ file, open the ‘Notes’ application and generate a new file. Then right click on the note and select ‘Lock Note’. Add a password to protect the file.
For other applications, open a document in the supported application, then select File > Set Password and add a password to protect the file.
Archive vault
When setting up a Mac, Apple asks whether to use ‘FileVault’ to protect the entire device through encryption. Once enabled, ‘FileVault’ fworks in the background to protect all your files on the fly. FileVault‘ is the easiest way to add encryption to your Mac and is the most far-reaching, as it covers everything.
When ‘FileVault’ is enabled, you will be given prompts for a password, which you must use each time you restart your Mac or wake from sleep mode, the must also set up an encryption. On OS X Yosemite or later, this can be your iCloud account, which can be your iCloud account, which can be your iCloud account. makes it much easier to unlock your computer.
If you prefer not to use iCloud FileVault recovery, you can create a local recovery key. The method is a little more secure, since the key is generally stored offline instead of on iCloud servers. However, most will choose iCloud, because it provides the simplest process, independently, without your password and iCloud account/recovery key, you will not be able to open your Mac and your data will remain locked..
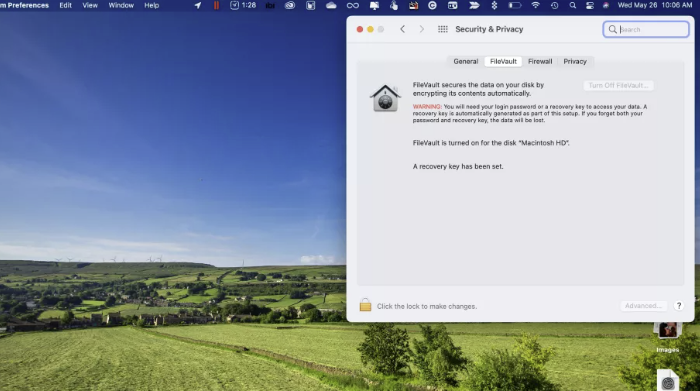
If you decide to do not activate ‘FileVault‘during the Mac configuration, You can do this at any time by following a few simple steps. Go to ‘System Preferences’ on your Mac, then choose ‘Security & Privacy’. Click the ‘FileVault’ tab, then select ‘Enable FileVault’ and follow the additional instructions.
You can disable ‘FileVault’ from the same screen. In this case, be sure to choose the padlock at the bottom left to unlock, Click on the ‘Disable FileVault’ button, then click on 'Disable FileVault'.
The biggest drawback to using ‘FileVault’ is the use of system resources, although that's less of an issue on newer Macs with more bandwidth than older devices. There's also the risk factor; if you lose your recovery code or can't log into your iCloud account, access to files on your computer could be lost forever.
If you have any questions about Encrypt or any other questions about Mac please contact us. here.
or in Datasystem.com